There are many benefits to creating and selling digital courses online…
- High margin – nearly 100% pure profit
- Scalable – you can sell an infinite amount
- Helpful – you can literally change people's lives with your courses
- Boosts authority – you've probably heard the saying, “you wrote the book on it”… well, that applies to courses too, “you created the course on it”, making you an authority on the subject
I'm sure there are more benefits, but those are the biggest.
This post is will walk you through the steps to create and sell “affordable” courses. Note: if you want more step-by-step instructions, you can checkout the course here.
What's An “Affordable” Course?
Before we dive into the details, let's define “affordable”…
- A course that's less than $300
And here are some of the pros and cons for selling these “affordable” courses…
Step 1) Plan & Create Your Course
If you don't have a course already, then you need to start here. If you already have a course, feel free to jump down to step 2.
There are a few things to take into consideration when planning your course…
- Audience – who is this course for? ex. Small business owners.
- Topic – what is the course is about? ex. Facebook ads.
- What type of course are you going to create?
- Mastery level – Everything you need to know about [topic]. ex. Everything you need to know about Facebook Ads.
- Results-based – How to [generate result]. ex. How to generate leads for your small business with Facebook Ads.
Once you've answered those questions, it's time to work on your course outline.
Creating an outline is a critical step because it…
- Ensures your course follows a logical progression.
- Ensures you cover all necessary topics and details.
- Makes your life easier because you don't have to think about “what to do next”, you already know what you need to do.
The video below will show you how I go about creating my course outlines. Note: the video is from the course, so you might hear me reference some other videos, but the “meat” of the training stands on it's own. Y don't have to watch those other videos prior to watching this one!
After you've taken a few days to plan your course, it's time to actually create it.
There are many ways to create a course, but here are a few of the key tools I use for mine:
Is your course made? Great, move onto the next step!
Step 2) Sell Your Course With A Funnel
Sure, you could sell your course by setting up a sales page, slapping a PayPal button on it, and delivering it via email. Or, by using a tool like Gumroad to make it even easier… but, in my experience, the best way to sell a course is with a sales funnel…
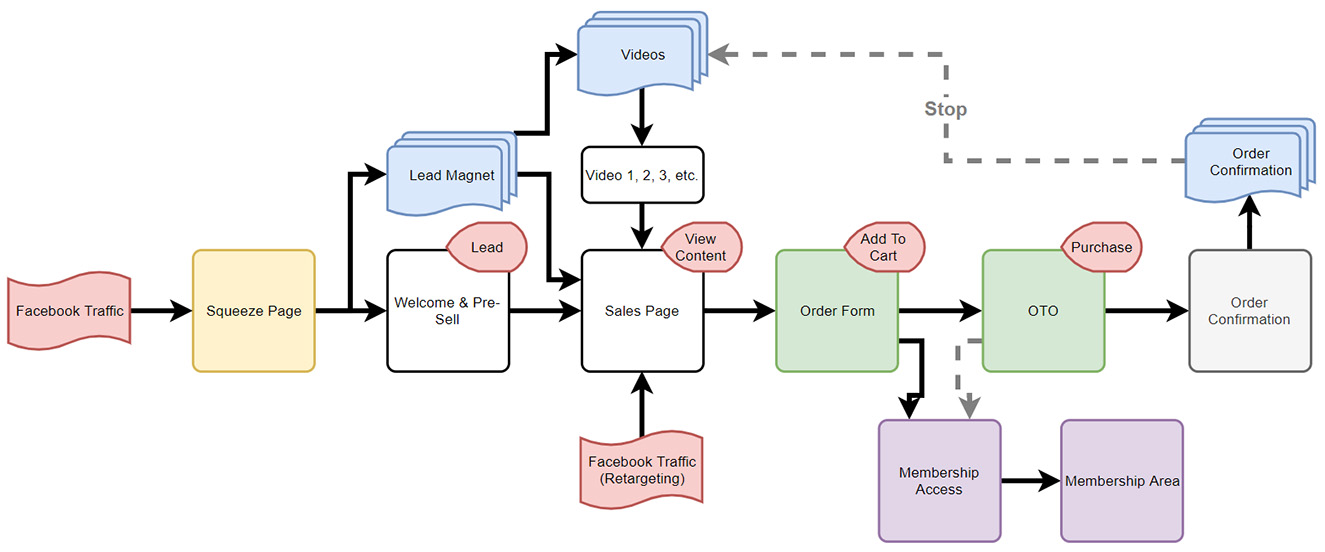
Why use a sales funnel? A couple reasons:
- Funnels can increase conversion rates. On average, sales pages convert between 1-5%; however, with the proper strategy, you can dramatically increase conversion rates by bringing people through a funnel which “warms” them up before presenting the offer.
- Funnels can increase Average Order Value (AOV). Funnels give you the opportunity to present more offers to people as they checkout in the form of order bumps, 1-click upsells, and 1-click downsells.
Obviously, being able to sell to more people and increasing the amount they spend is something we all want to do… right?! Well, a funnel is the best way to do it!
Let's examine the parts of the funnel:
1) Squeeze Page
The “Squeeze Page” is designed to capture someone's contact information in exchange for a Lead Magnet. Having someone's contact information gives you the opportunity to follow up with them and build a relationship.
A Lead Magnet is something of value that your potential customers want. It can be a checklist, cheat sheet, flowchart, or even video training.
Ideally, you'll be able to use a resource (pdf, doc, etc.) or even a training video from your course, as your Lead Magnet.
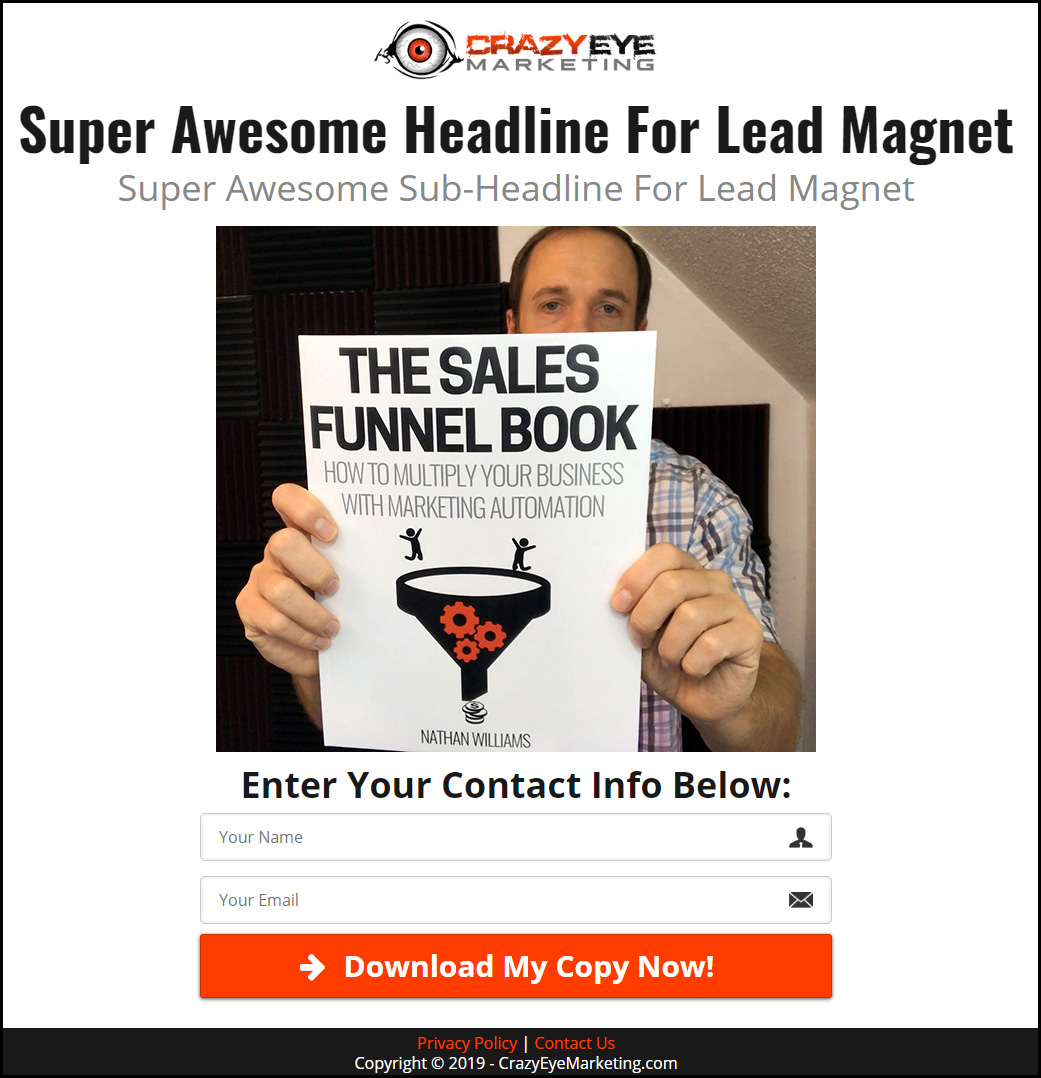
From my experience, having a very simple squeeze page with a headline, possible sub-headline, and a picture of the offer, tends to convert better than something “fancy” with a lot of details.
This is my top converting squeeze page format:
2) Welcome and Pre-Sell Page
The Welcome and Pre-Sell Page is the page an individual lands on after they request your Lead Magnet.
There are 2 courses of action you can take on this page…
Course of Action #1: Pre-Sell
For this CoA, I recommend having a short 1-5 minute video that does the following…
- Congratulates them on requesting the lead magnet and tells them it will land in their inbox in the next few minutes. Also, remind them to check the spam folder if they don't see it.
- Confirm the lead magnet will help them with X, Y, and Z, but…
- It's just one piece of the puzzle. If they really want to get to the next level… you have a special offer for them on the next page! (you can end the video here if you want, or you can keep going…)
- Who, What, When, Where, Why, and How…
- Who needs this special offer? Call out your audience. Makes sure people are in the right place… this special offer is for small business owners looking to drive more leads.
- What is the special offer? It's a step-by-step video course on [topic] with dozens of resources and flowcharts, supportive community, and a 30 day money back guarantee.
- When is the special offer? You can gain instant access right now at this introductory price; however, the price will go up in the near future.
- Where is it? On the next page!
- How to get it? Click the button below… (you can end the video here if you want, or you can keep going…)
- Here's what our customers are saying about the course… scroll through testimonials, reviews, and real world results.
Course of Action #2: Teach
In this CoA, you're not going to go straight into selling.
Instead, you're going to deliver the Lead Magnet right on this page, so they have instant access.
Then, teach a lesson on the Lead Magnet – how it relates to them and how to use it so they can get the most out of it. This training will be as long as you need – from 3 minutes to 90 minutes and anything in between is perfectly fine here.
During the training, you want to soft-sell and tease your course. Basically, highlighting the fact that the Lead Magnet isn't “everything” and there's more stuff they can learn from you.
I highly recommend split-testing these two CoAs.
The Page
Here's what my typical Welcome & Pre-Sell page looks like:
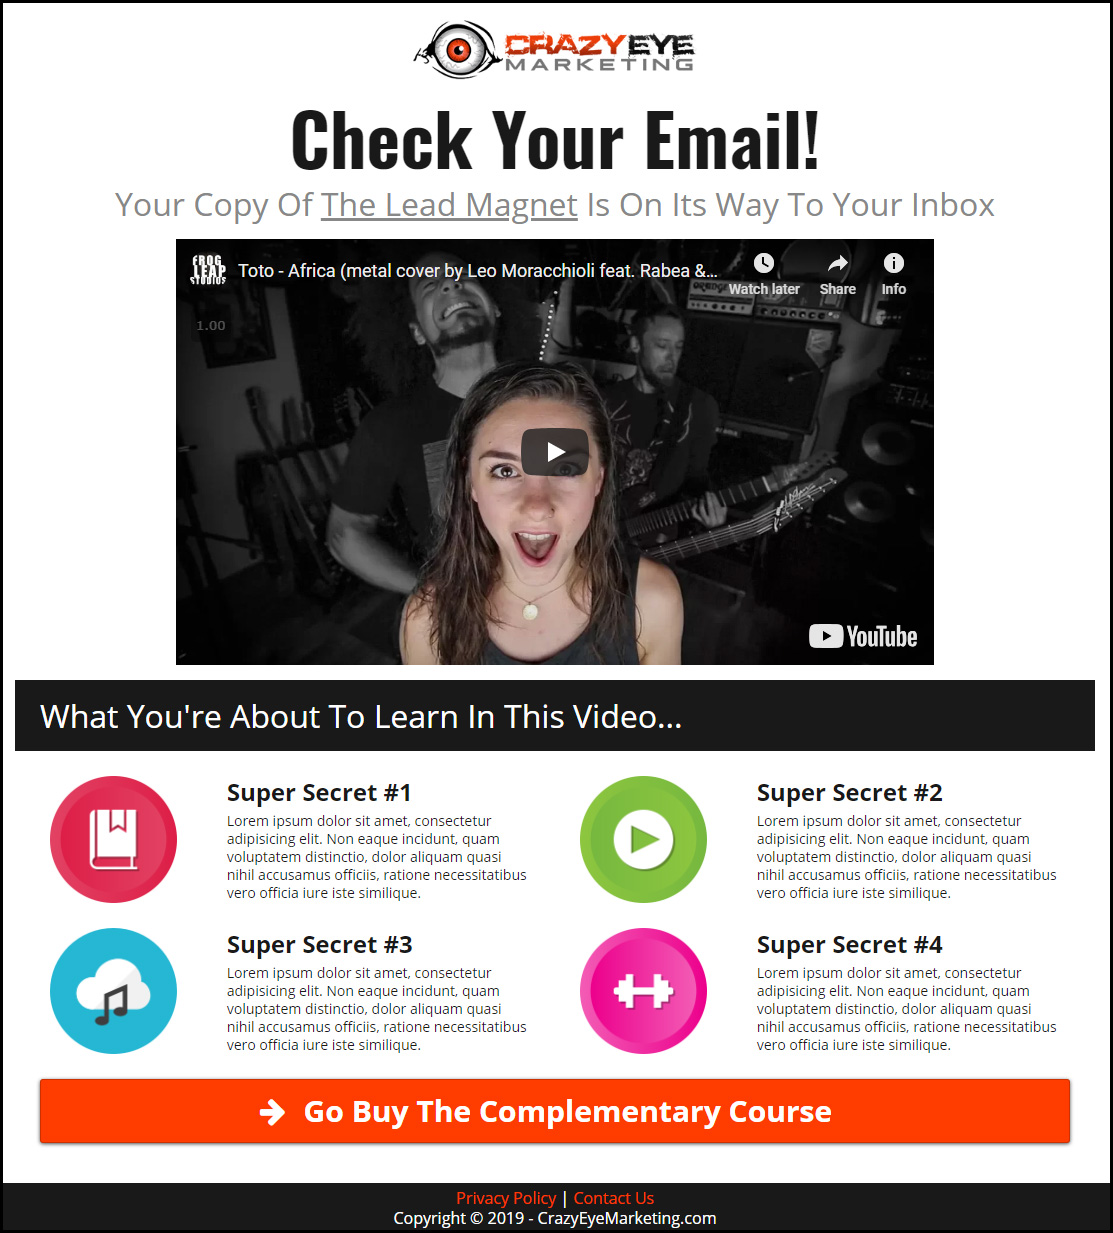
The content on the page is pretty self-explanatory, so I won't bore you with those details. Below the video, you may want to have a few bullet points that highlight the key points covered in the video, just in case someone would rather read than watch.
3) Sales Page
The Sales Page is the page where you sell your course. (obviously!)
While you've certainly seen thousands of sales pages in your lifetime, you may have never created one.
To help you understand the underlying principles of a sales page, here's a breakdown of the common elements most sales pages have:
- Headline – Only job is to capture attention
- Ex. How to get [benefit] without [pain].
- Subheadline – Clarify headline, share main benefit of the offer
- Ex. Title of your course. (or vice versa, use the title of your course as the headline with the formula as the subheadline)
- Image – You will likely have a bunch of images on your sales page; however, the very first one should be focused on grabbing attention
- Video – You can use a video instead of an image. In the video, cover the…
- Who – Who are you and who is your course for?
- What – What do you have to offer?
- Why – Why should someone want what you’re offering? Scarcity!
- How – How to get what you’re offering?
- Lead Copy – Brief paragraph that pulls the individual into the rest of your sales page
- Trust Signals – Social proof, testimonials, “as seen on”, etc.
- Longer Copy – What you’re actually selling. Features, benefits, description of offer (what they get, bonuses, payment options, etc.), etc.
- For courses, I breakdown all of the individual lessons and share their benefits
- Call To Action (CTA) – How to get it
Here's what my typical Course Sales Page looks like:

4) Order Form Page
The Order Form Page is where the individual enters their payment information, selects their payment option (if there are any), and actually buys your course!
Here's my typical Order Form Page:
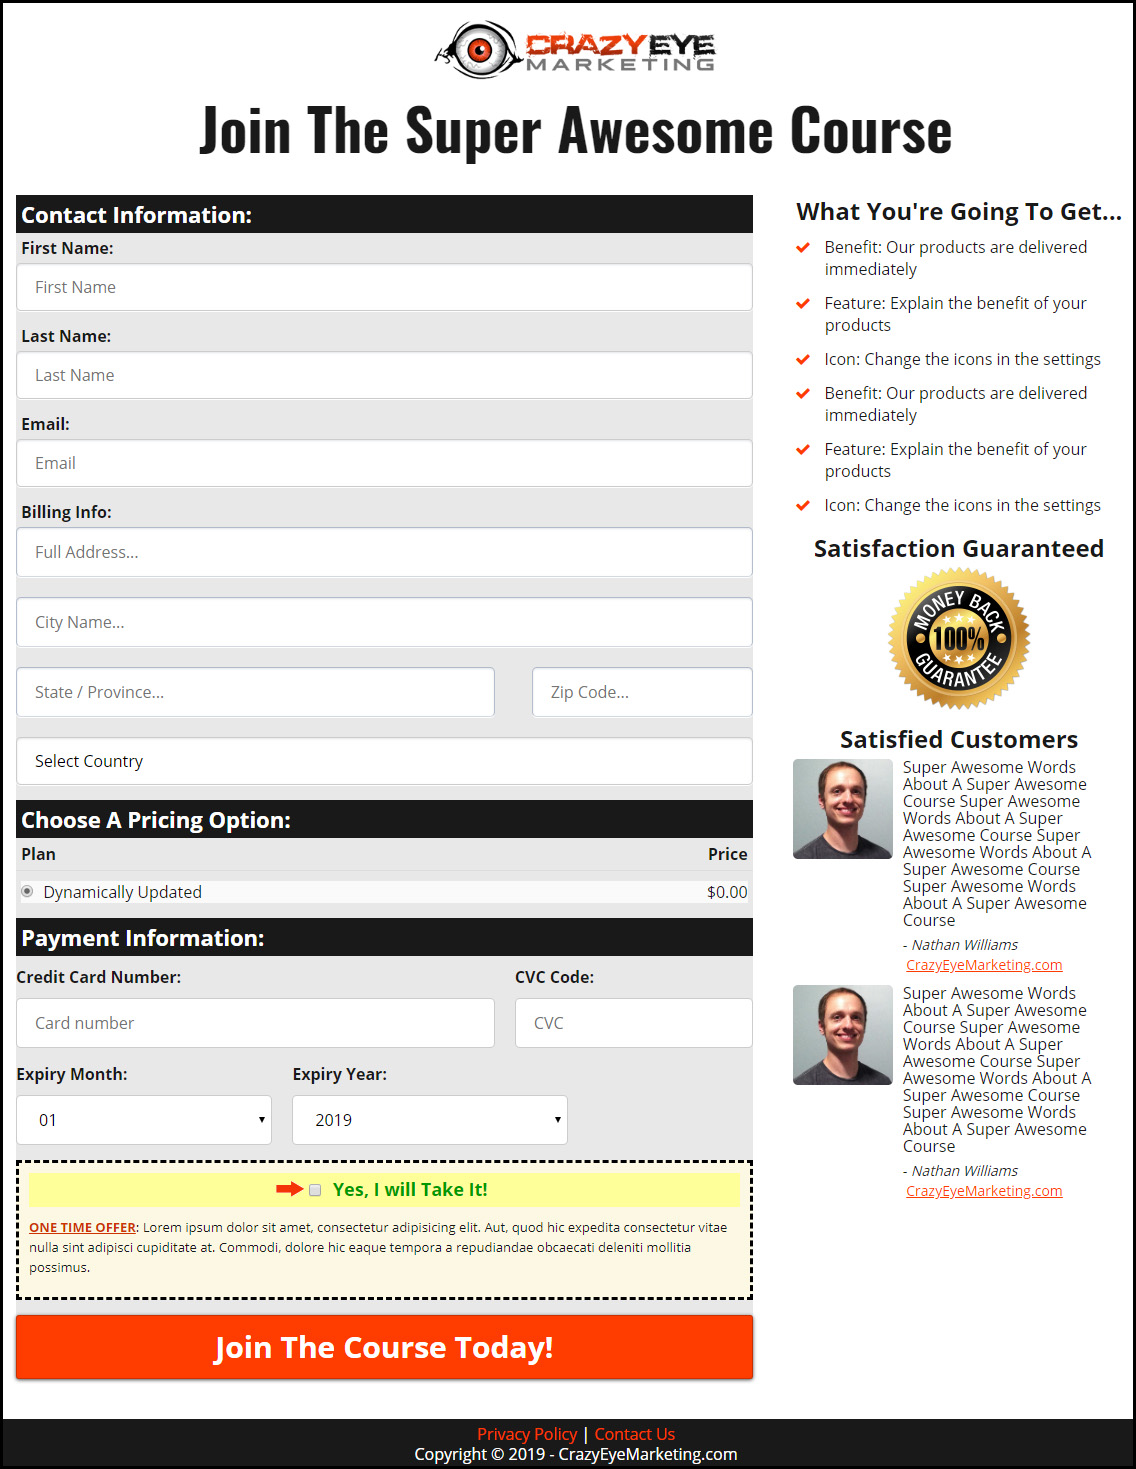
I believe the elements on it are pretty self-explanatory. I'll cover the key ones briefly…
- Re-confirm they're about to purchase the correct product
- Highlight your guarantee
- Include more social proof
- Request their payment information
- Note: Even though you don't need their physical address because they're buying a digital product and you're not shipping them anything… I still recommend asking for that information because it reduces fraud.
5) OTO Page
The One-Time-Offer (OTO) page is the page immediately after the order form page.
This page presents another offer to your customer in the form of a 1-click upsell. (by clicking “Yes, I Want It!”, the customer can upgrade their order with the offer on the OTO page)
This offer should complement the course they just purchased from you. Some good options are:
- Coaching/Support – 1-on-1 call, group coaching, etc. / one-time or recurring
- Something Extra – Another plan, calculator, tool, etc. that will help the individual achieve their goal
- Another Course – Another course you have that your customer might also be interested in
Here's what my typical OTO page looks like…
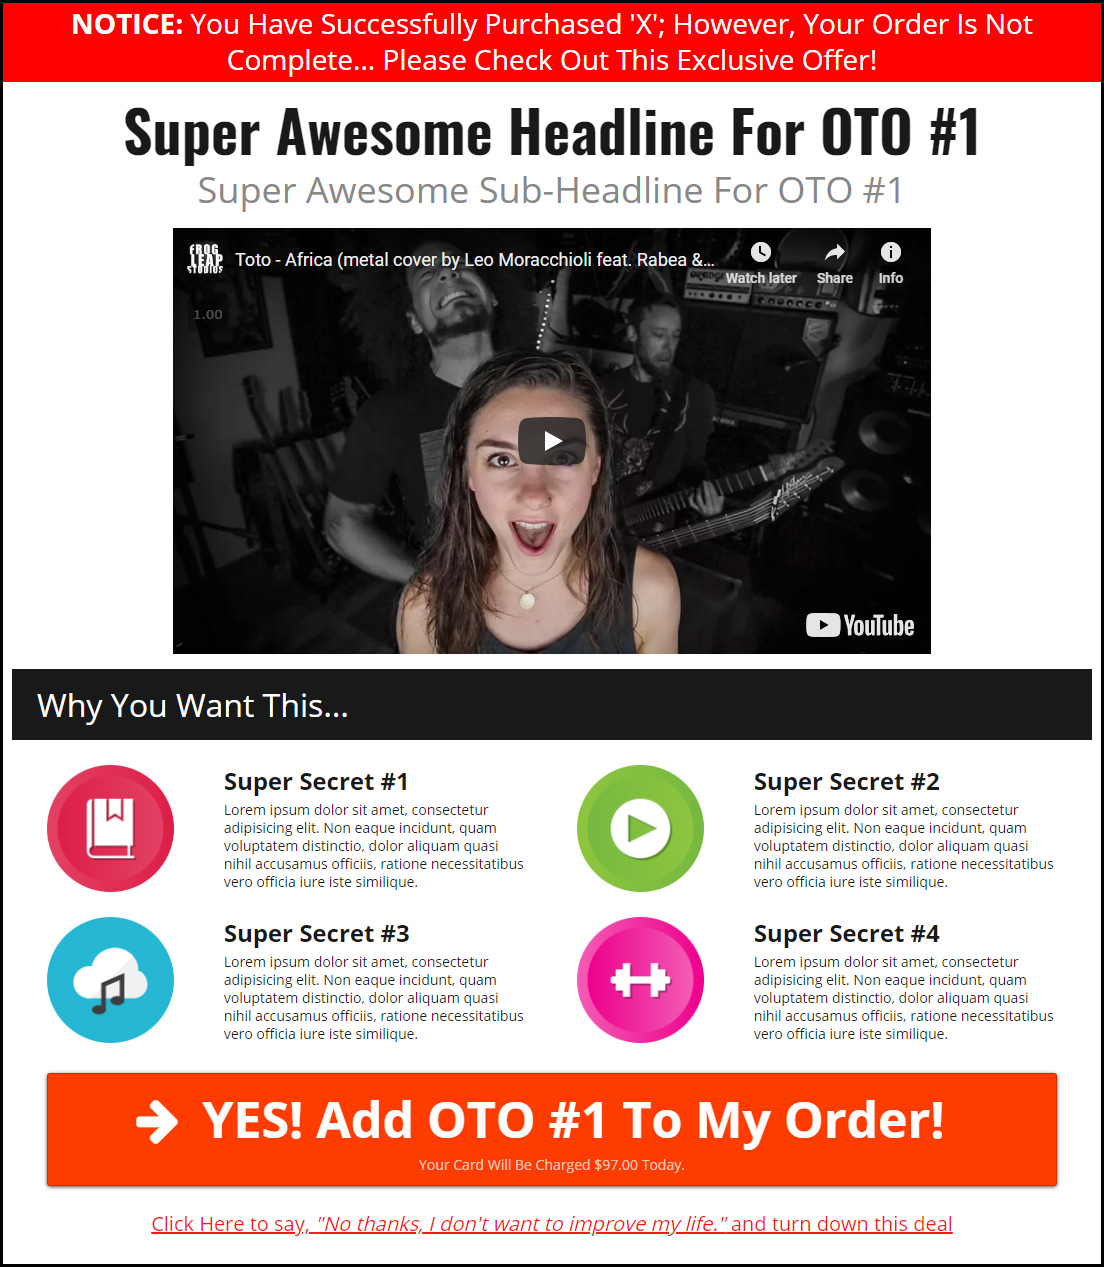
It looks quite similar to the “Welcome and Presell” page, right?! Why? That page structure works!
To breakdown some of the elements on this page:
- The page starts with a notification to let people know they've purchased the course; however, their order is incomplete and they have a chance to upgrade their order.
- Then, there's a headline and sub-headline, just like all the other pages. Same concept here.
- The video should be short, about 2 minutes or less. People are wanting to get into the course and aren't very patient on this page so don't overwhelm them with too much information. The general flow of the video is:
- Congrats on buying the course, it will help you with X, Y, and Z!
- Now, if you want to take it to the next level, you'll want to also grab [OTO] as it will do A, B, and C!
- I normally charge $197 for it, but on this page only, it's $97! That's 50% off!
- Click the button below to add it to your order!
- Include a few simple bullets that highlight the details outlined in the video.
- Have a big, giant, 1-click upsell button and a “No” Link.
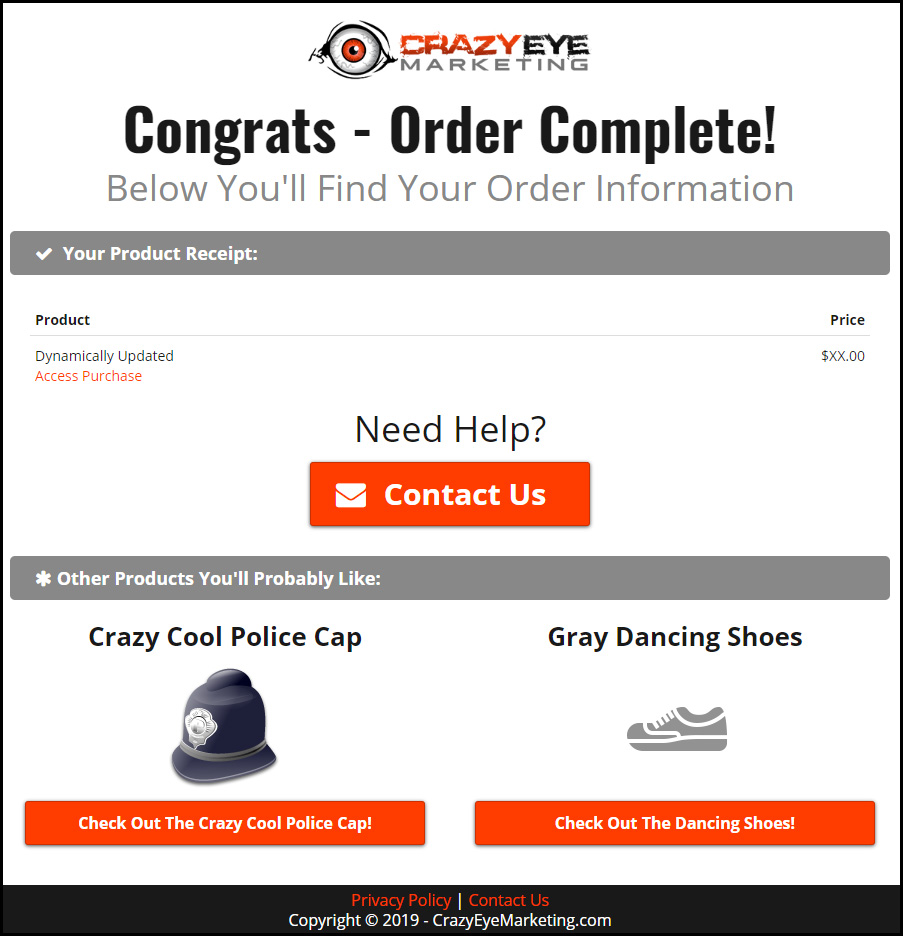
6) Order Confirmation
The Order Confirmation Page is the final page your customer lands on after purchasing your course and hopefully your OTO.
It simply confirms their order, gives a summary, tells them how to access their purchase and support, and possibly contains links to other offers you sell (Offer Wall).
Here's my typical Order Confirmation Page…
7) Membership Pages
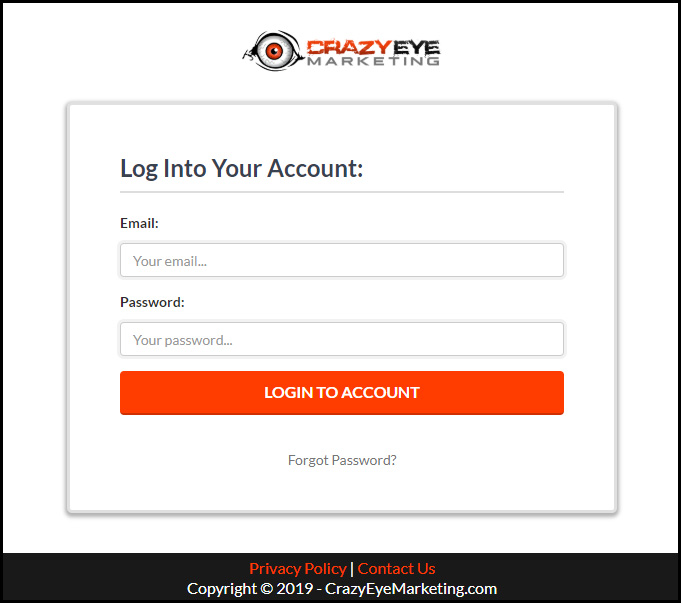
The funnel also includes the Membership Pages.
The first is the Membership Access page. It lets people login and/or create an account…
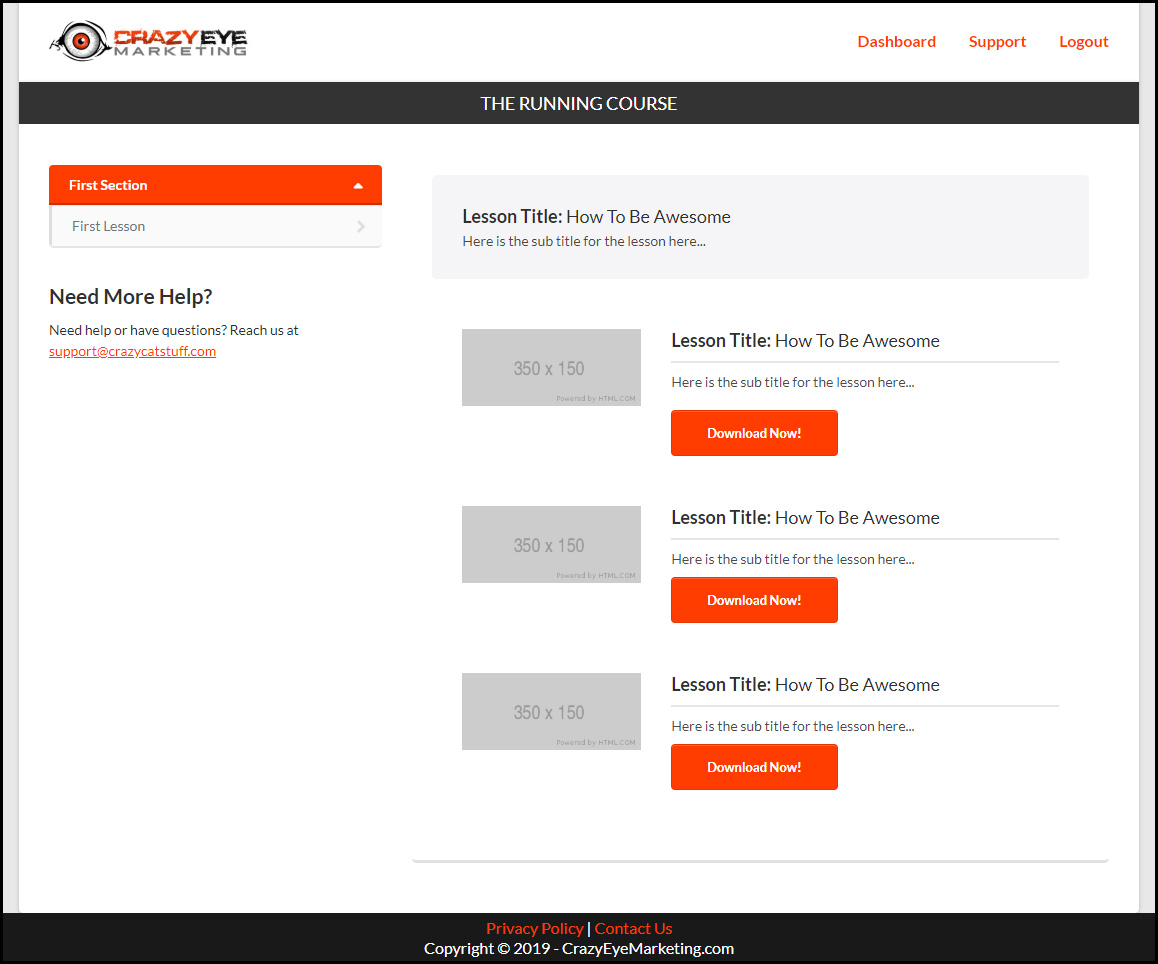
Then, the second page is the Membership Area.
This is where you have your course.
8) Lead Magnet Delivery Automation
The first automation in your funnel is the “Lead Magnet Delivery” automation.
This is a simple automation that delivers the lead magnet you're offering on your squeeze page.
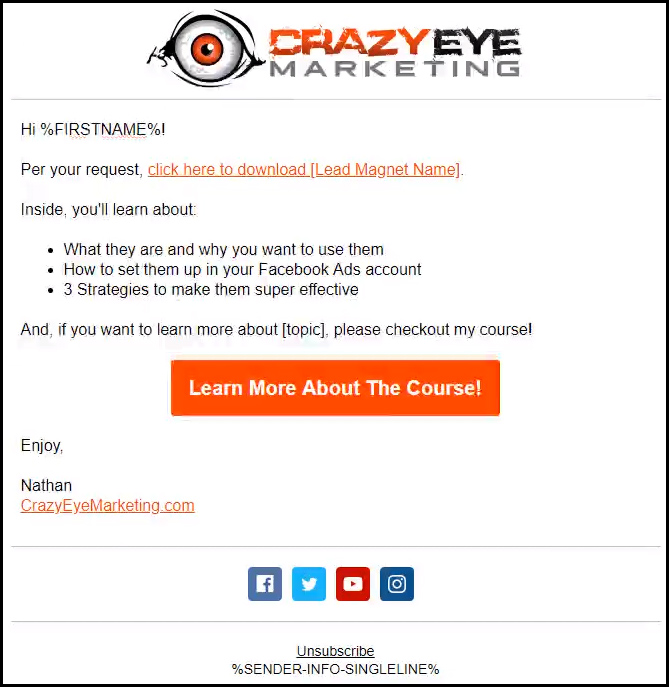
There are 3 primary elements of this email:
- A link to the promised resource
- A reminder of why they requested the resource and some reasons to go check it out right now
- A subtle Call-To-Action (CTA) for your course
Here's what my typical “Lead Magnet Delivery” email looks like…
9) Video Delivery Pages & Emails
After delivering the Lead Magnet, you should wait a day before beginning to drip high quality content to your lead.
What is “high quality content”?
My recommendation is a video training series and/or other resources that prove you know what you're talking about while simultaneously getting people to know, like, and trust you. All the while, subtly promoting your course.
If you're familiar Gary Vaynerchuk's, “Jab, Jab, Jab, Right Hook” concept… this is what you're doing here.
The Video/Resource Content
Here are a few ideas for the video/resource content you can send to people:
- First few videos of your course. Think of it like a “free trial”.
- Use select videos from your course. If you have certain videos that can stand on their own and provide really valuable insight, you can use them as your content.
- New videos that teach the overarching strategy/theme. For instance, create new videos that teach the “what” of each section of your course – ie. for a course about creating courses, one video could be about course planning, one on course creation, one about the funnel, one about marketing automation, and so on. Basically, teaching people the concept of your course, while not telling people “how” to actually do it. (they need to buy the course to get the “how”!)
The Video Pages
While you can host your videos on public sites like YouTube and Vimeo, I would not recommend sending people to either of those sites to actually watch your videos.
Instead, create unique pages for each video and embed the video on those pages.
Here's my typical video page:
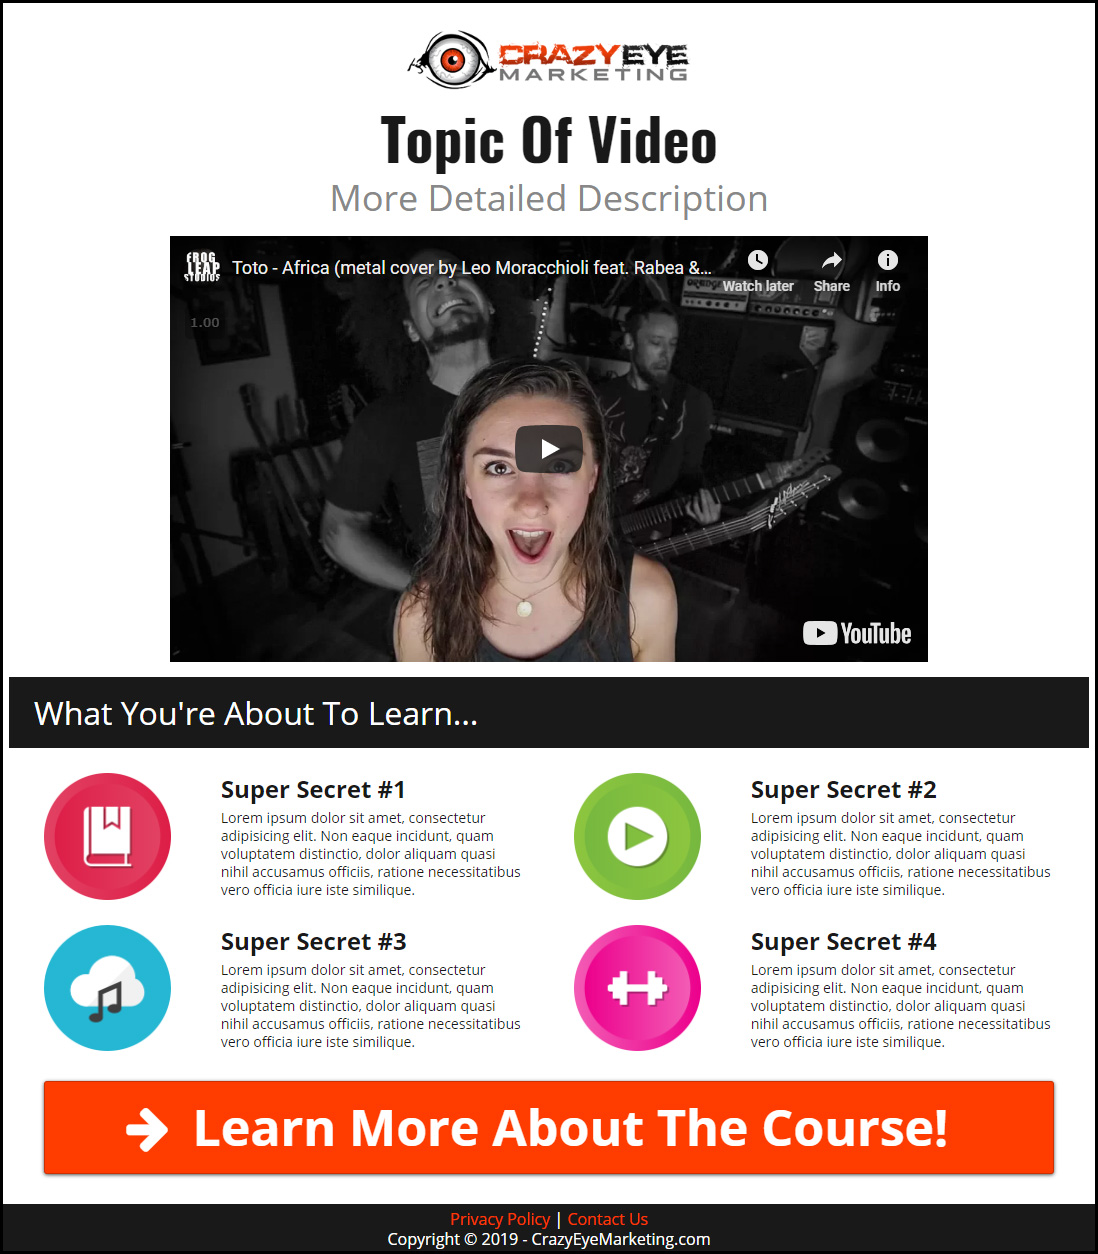
Say what?!?! That page looks just like the Welcome and Presell and OTO pages!!!
Yes. Yes it does.
Again, if it ain't broke, don't fix it.
Obviously, on this page you have the topic of your video as the headline/subheadline, the video will be your training video, the bullets will outline what they're going to learn in the video, and the big CTA button will take them to your course's sales page. Simple.
The Video Delivery Emails
To get people to watch your training videos, you'll primarily use email marketing. (you could also get fancy with retargeting, but that's beyond the scope of this article)
Here's my typical email:
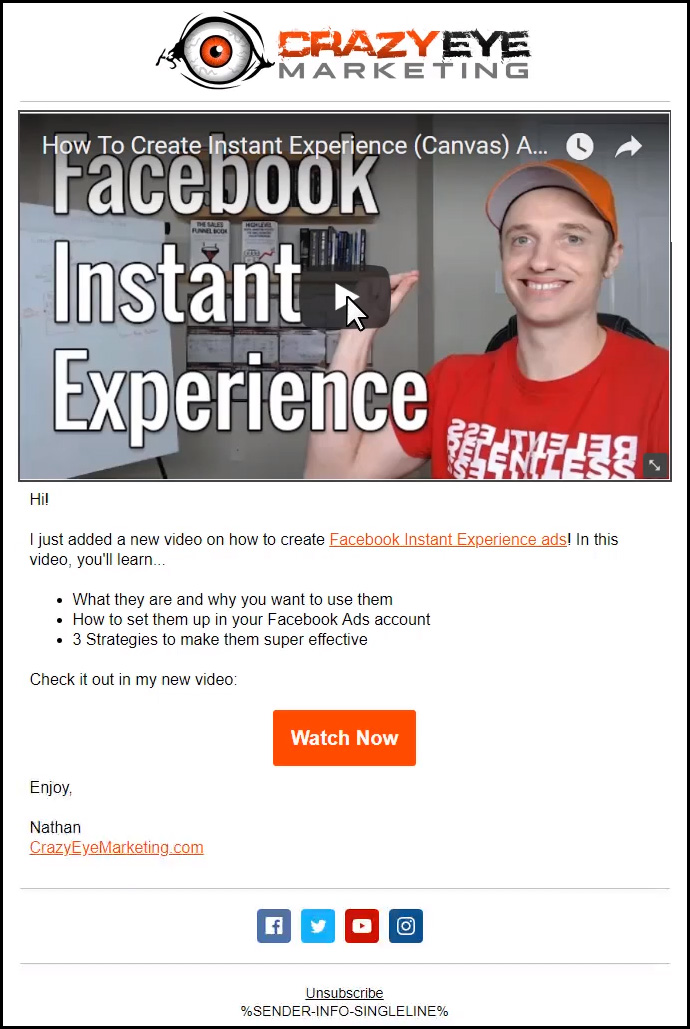
It's a pretty simple and self-explanatory email; I'll just outline it really quickly…
- Include a screenshot of the video with a super-imposed “play” button on it. When the person clicks on the image that looks like a video, they'll be taken to your video page where they can watch it.
- Include a short description of the video with a few bullets outlining what they'll learn. Recommend having a text link somewhere in the written description.
- Include a button with a link to the video page.
The Order Confirmation Email
The Order Confirmation Email is sent to your customers.
It contains information on how to access their purchase:
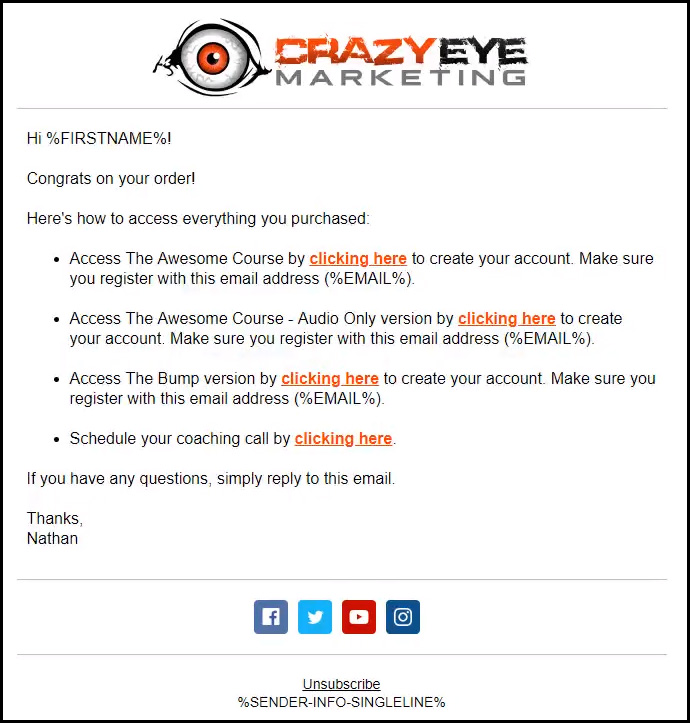
The content of the emails is self-explanatory; however, it should be dynamic and only present access information to the products/services the customer purchased.
3) Send Traffic
After creating your course and building a sales funnel to sell it, it's time to find some people to buy it… it's time for some traffic!
Of course, there are many ways to send traffic, but in this section we're going to focus on Facebook traffic because it works very well for selling digital courses.
If you refer back to the funnel diagram above, you see there's really only two places we're going to send traffic for this particular funnel. (of course, you can get more advanced with it, but let's get the basics down first!)
You should spend 90-95% of your budget, sending traffic to your Squeeze Page… you need to get people on your lists! Note, there are two lists here, your email list and your retargeting list. This way, even if they don't opt-in for your Lead Magnet, you still know they're interested in your particular topic. Once they're on your retargeting list, you can recommend other Lead Magnets they may be interested in (if you have them) or go straight into promoting the course.
The remaining 5-10% of your budget will be spent on your retargeted traffic – people that have engaged with you already. You want to direct this traffic directly to your course's sales page.
That's the core of the ad strategy for this funnel. It's pretty simple, but works amazingly well when you have a Lead Magnet and course people actually want!
Ad Copy 101
No matter whether you're sending traffic to your Squeeze Page or Sales Page, the basic ad copy strategy remains the same.
This video gives ya the basic ad copy strategy to apply to your ads:
4) Scaling Your Business
Congrats on launching your course! That's a big accomplishment and more than most people will ever do!
Now that you're armed with one course, it's time to think about scaling your efforts.
There are two ways to scale…
- Out – Create more courses that complement the course you just created. For example, I have a course on creating courses. In that course, I briefly cover ClickFunnels, ActiveCampaign, and Facebook Ads. What I can do now is create more detailed courses on those various tools, so if people want to learn more… they can!
- Up – Create more expensive courses/resources to sell. Offer done-for-you services or other, complementary services. Offer coaching/consulting. Create a Mastermind group.
- Up & Out – Create more complementary courses AND offer more products/services that are more expensive, but provide more value to your customers.
Everything in this section should be pretty obvious, but I wanted to make sure you realized creating one “affordable” course probably isn't going to be enough to change your whole life. However, by scaling your efforts out and/or up, the sky is the limit on how much money you can make!
Build A Course & Funnel
I hope you learned a lot from this post.
I really tried to lay out the entire plan for creating and selling “Affordable” courses.
Having said that, if you would like to learn all the nitty-gritty technical details and to get a copy of the Course Creator's Sales Funnel…
I have a course for you!
